

Tips for Designing High Quality Custom Apparel
Table of Contents
- Start With the Right Garment and Fabric
- How to Design a Custom T-Shirt That Stands Out
- Master Color, Contrast, and Legibility
- Custom Apparel Printing Methods and Selection
- Custom T-Shirt Design File Requirements and Specifications
- Quality Control, Testing, and Fit Placement
- Custom Clothing Design Ideas for Every Occasion
- Conclusion
- Frequently Asked Questions
Last Updated: October 12, 2026
Start With the Right Garment and Fabric
The right base garment, fabric, fit, and construction, determines everything that follows, which is why tips for designing high quality custom apparel always start here.
Cotton remains the gold standard: pre-shrunk cotton holds its shape and accepts dyes and prints beautifully. Look for a tight weave to resist pilling and 6+ ounce fabric for durability through repeated washing.
Lightweight cotton suits summer designs; sweatshirts need brushed fleece or French terry. Blends add stretch and wrinkle resistance, but pure cotton prints most predictably.
Quality garment construction includes:
- Double-stitched seams that won't split
- Reinforced collar and armhole bands
- Proper cuff construction that won't fray
- Even dyeing with no color variations
How to Design a Custom T-Shirt That Stands Out
Research Your Target Audience and Market
Your audience shapes every choice about color, complexity, messaging, and style.
Define your audience clearly: teachers, athletes, age groups, and professional communities each have different expectations.
Research what your audience already wears and buys via social media, online communities, and retail sites in your niche, noting patterns in color, graphic styles, and messaging.
Market research for custom apparel includes:
- Competitor analysis of similar designs
- Audience feedback through surveys or focus groups
- Trending designs in your niche
- Seasonal and cultural considerations
- Price sensitivity and perceived value
The more specific your audience, the sharper your design: one for "elementary school teachers celebrating end-of-year" beats a design for "everyone."
Build a Design Concept and Mood Board
A mood board is your visual reference library before creating artwork.
Gather images, color combinations, fonts, and design styles that resonate with your concept, looking for patterns that match your brand identity and appeal to your audience.
Create your mood board using:
- Pinterest boards for visual inspiration
- Color palette tools to test combinations
- Font samples showing how text looks at different sizes
- Competitor designs (for reference, not copying)
- Real-world examples of successful custom apparel
A strong mood board clarifies your direction and prevents chasing ideas that don't fit your vision. Share it with trusted feedback sources before investing in full design creation.
Master Color, Contrast, and Legibility
Color choice makes or breaks a design. Screens use light (RGB) while fabric printing uses pigments or dyes, so colors won't match exactly.
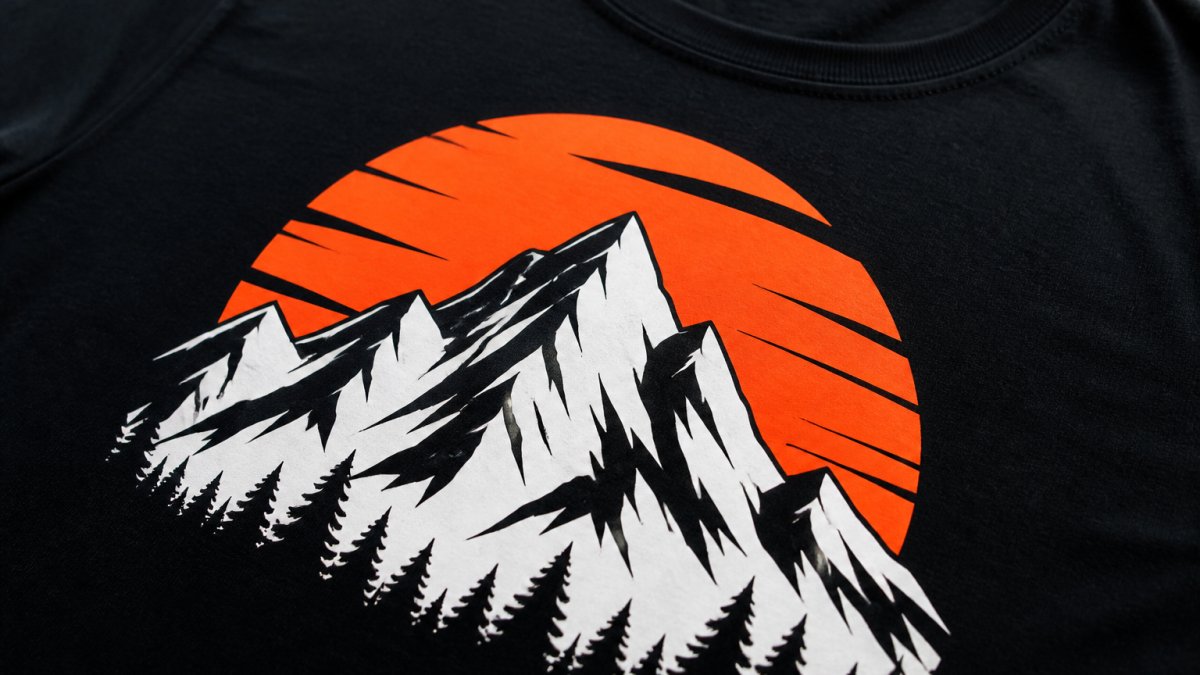
Test colors in your actual printing method and request samples: what looks vibrant on screen might print muddy, and what seems bold might disappear into the garment color.
Strong contrast between design and garment ensures legibility from a distance: high contrast reads clearly even when small, while low contrast blurs together.
Legibility rules for custom apparel:
- Keep text large enough to read from 3 feet away
- Use sans-serif fonts for simplicity and clarity
- Avoid thin or overly decorative fonts
- Maintain high contrast between text and background
- Limit text to essential messaging
- Test designs at actual size before production
Colors that work well together across different printing methods:
- Black on white or light colors
- Dark colors on light backgrounds
- Saturated colors with clear separation
- Avoid light text on light backgrounds
Custom Apparel Printing Methods and Selection
Your printing method affects design limitations, durability, color range, and cost.
Screen printing suits bold, simple designs with limited colors.
Embroidery adds texture and perceived quality on any garment, but the design must be digitized properly.
Heat transfer applies pre-printed designs with fast turnaround for small orders, but quality varies widely by transfer material and application.
Sublimation bonds dyes directly into polyester for vibrant, photo-quality results that don't fade or crack.
A Decision Framework for Choosing a Method
Work through these questions in order. The first constraint that applies usually eliminates most options.
- What is the garment fiber? Polyester and light-colored performance fabrics point to sublimation. 100% cotton points to screen printing or DTG. Blends and dark garments point to screen printing, DTG with a pretreatment, or heat transfer. Embroidery works on nearly any fiber.
- How many colors and how much detail? One to three flat colors favors screen printing. Photographs, gradients, and unlimited colors favor DTG or sublimation. Fine linework and small text favor printing over embroidery.
- What is the order quantity? Small runs (roughly under two dozen) favor DTG, heat transfer, or embroidery, which carry little or no setup cost. Large runs favor screen printing, where setup cost is amortized across many units.
- How long must it last? For maximum wash durability, screen printing, embroidery, and sublimation lead. Heat transfer durability depends heavily on the transfer material and application.
- What is the budget shape? If you have low upfront budget but high volume, screen printing wins on per-unit cost. If you have low volume and low upfront budget, DTG or heat transfer wins.
| Printing Method | Best For | Durability | Setup Cost | Per-Unit Cost |
|---|---|---|---|---|
| Screen Printing | Bold, simple designs; large runs | Excellent | High | Low (high volume) |
| DTG | Complex, photo designs; small runs on cotton | Good | None | Medium |
| Embroidery | Premium, textured look; any fiber | Excellent | Medium | High |
| Heat Transfer | Quick turnaround; small runs | Fair | None | Medium |
| Sublimation | Vibrant, photo-quality on light polyester | Excellent | None | Medium |
Custom T-Shirt Design File Requirements and Specifications
Your printing vendor has specific technical requirements for design files. Missing them causes delays, reprints, or poor quality, so here are the production specifications most guides skip.
Resolution and File Type
Resolution determines how sharp your artwork prints.
Vector files are resolution-independent and preferred for logos, text, and flat-color graphics. Raster suits photographs and complex gradients. If your design combines both, keep vector elements as vectors and raster elements at 300 DPI or higher.
Common accepted formats include PDF, AI, EPS, and high-resolution PNG with a transparent background. Confirm which formats your vendor accepts before exporting.
Color Profiles and Color Mode
Color mode confusion causes reprints. Screens display in RGB; printers work in CMYK, and converting between them shifts colors, sometimes dramatically in saturated blues, greens, and oranges. Design in CMYK from the start and expect the on-screen preview to differ from print.
For screen printing, specify spot colors when exact brand colors matter, they're mixed to a standard reference for more consistent results across runs. For DTG and sublimation, CMYK is typically the working space.
Bleed, Safe Margins, and Transparent Backgrounds
Bleed is extra artwork extending past the final trim or print edge so alignment shifts don't leave a visible border.
Safe margins keep critical elements (text, logos, faces) away from print area edges so seams, collars, or the garment's curve don't clip them.
Transparent backgrounds are essential on colored garments, a design saved with a white background will print a white box around the graphic. Export PNGs with transparency or supply vector files with no background.
Layers, Naming, and Vendor Templates
Separated layers make multi-color designs easier to produce. Keep each color on its own clearly labeled layer; for screen printing this speeds setup and reduces the chance of a missed color.
Clear file naming prevents version confusion. Include the project name, garment, print location, and version number so the vendor can tell at a glance which file is current.
Ask your vendor for a design template before you start. It shows where your design can go, safe margins, and technical limitations, preventing costly mistakes.
Quality Control, Testing, and Fit Placement
Test before committing to full production. Order a sample garment with your design and evaluate quality, color accuracy, and how it looks on an actual person.
Check your sample for:
- Color accuracy compared to your design file
- Print or embroidery quality and sharpness
- Durability through a test wash cycle
- Proper sizing and fit
- Any defects or quality issues
Design placement matters more than most people realize.
Consider garment curves and fit when placing designs. Chest prints work on most body types. Back prints need careful vertical placement.
Fit testing prevents costly exchanges.
Quality control for custom apparel includes:
- Visual inspection for print defects
- Color consistency across units
- Stitching quality and durability
- Proper sizing and fit
- Packaging and shipping condition
Document your testing process and keep samples from each production run. This creates a quality baseline and helps you catch issues early.
Custom Clothing Design Ideas for Every Occasion
Custom apparel works for specific moments and celebrations.
Teacher appreciation gifts celebrate educators with apple motifs, thank-you messaging, or subject-specific graphics. Keep designs professional but warm.
Family trip merchandise commemorates shared experiences.
Wedding party apparel needs cohesion and elegance. Matching designs build team spirit.
School event shirts build community. Class names, graduation years, or team names create belonging.
Holiday gifts celebrate personal connections.
The best custom apparel designs serve a purpose beyond the garment. They commemorate moments, celebrate people, or build community.
Conclusion
These tips for designing high quality custom apparel require intentional choices at every step. Start with quality garments and fabric that hold up to wear and washing. Research your audience so your design speaks directly to them. Master color, contrast, and legibility.
Urban Echo Tees specializes in creating custom apparel that celebrates meaningful moments. From teacher appreciation gifts to family trip merchandise, we create custom apparel designed to celebrate life's most meaningful moments. Explore custom apparel design trends and best practices shows that thoughtful, well-executed designs drive real results.
Frequently Asked Questions
What makes a custom apparel design look professional?
Professional custom apparel design combines clear, legible artwork with intentional color choices and proper placement on the garment. Keep designs simple and recognizable, use high-contrast colors that complement the fabric, and ensure fonts are readable from a distance. Select a printing method that matches your design complexity, screen printing works well for bold, solid graphics, while direct-to-garment printing handles detailed, multi-color artwork. Always request a sample before ordering bulk quantities to verify quality and color accuracy.
What file format is best for custom apparel printing?
Most custom apparel manufacturers accept vector files (AI, EPS, or PDF) as the gold standard because they scale without quality loss. For raster images, provide high-resolution files at 300 DPI minimum. Ask your printer about specific file requirements, some prefer CMYK color mode for screen printing, while others use RGB for direct-to-garment printing. Include bleed areas and avoid thin lines under 0.5 points. Confirm file specifications with your manufacturer before finalizing artwork to prevent delays or quality issues.
How do you choose the right printing method for custom apparel?
Match your printing method to your design complexity, color range, and durability needs. Screen printing delivers bold, long-lasting results for solid-color designs and works well for large orders. Direct-to-garment (DTG) printing handles detailed, multi-color artwork and photos but suits smaller quantities. Embroidery creates a textured, premium finish for logos and simpler designs. Heat transfer works for photo-realistic designs but may crack over time. Consider your order quantity, budget, and how long the design needs to last before selecting your method.
What should I check during quality control for custom apparel?
Request a sample before approving production. Inspect color accuracy against your original design file, check print placement and alignment on the garment, examine print detail and edge definition, and test durability by washing and drying the sample. Verify that artwork is sharp and legible, colors haven't bled or faded, and the design adheres properly to the fabric. Confirm sizing is accurate and the garment fit matches your expectations. Document any issues and communicate corrections to your manufacturer before the full order ships.